Most people change chandelier bulbs more often than they should have to, simply because they buy the wrong replacement. Before you even touch the ladder, knowing your fixture saves you two trips up and a lot of frustration.
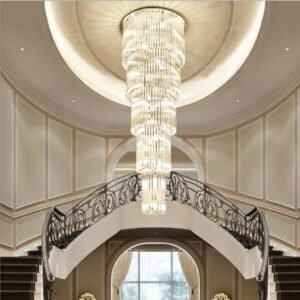
Whether you have a grand crystal fixture in your majlis or a sleek modern chandelier above your dining table, the process is largely the same. What changes is the bulb type, the socket, and how much access you have. This guide covers all of it.
Quick Summary
- Solution: Ensure safety by switching off power, use the right tools, and follow a step-by-step approach to replace chandelier bulbs.
- Time Required: 15-30 minutes
- Difficulty Level: Easy to Moderate
- Tools Needed: Ladder, gloves, soft cloth, replacement bulbs, and possibly a screwdriver.
Before You Start
Two minutes of preparation here prevents a second trip up the ladder.
Know Your Socket Type
Chandelier bulbs are not universal. The most common socket types you will find in UAE chandeliers are E14 (small screw), E27 (standard screw), G9 (pin base, used in halogen and some modern fixtures), and GU10 (twist and lock, common in recessed chandelier arms). Check the old bulb before you buy a replacement. The socket type is usually printed on the base.
Explore our blog on “Guide to Common Light Bulb Types and Bases”
Check the Maximum Wattage
Every chandelier has a maximum wattage rating, usually printed on a small sticker inside the canopy or on the socket cup. Exceeding this rating is the single most common cause of chandelier wiring damage. If you are switching to LEDs, this becomes less of a concern since LEDs run much cooler and draw far fewer watts, but you still need to confirm socket compatibility.
Let the Bulbs Cool Down
If the chandelier was on recently, give it at least 15 minutes before touching anything. Halogen and incandescent bulbs get hot enough to cause burns and, in some socket types, will unscrew with friction damage if you rush it.
Step-by-Step Guide
1. Turn Off the Power
Switch off the chandelier at the wall, then go to your circuit breaker and cut power to that circuit entirely. Do not rely on the wall switch alone. A chandelier has multiple sockets wired in parallel, and a fault in one can still carry current to others even when the switch is off.
Stick a note on the breaker or ask someone to watch it. In a house with several people, accidental switch-ons are more common than you think.
2. Prepare Your Tools
Take one of the old bulbs with you when you buy replacements. Match the base type, the shape, and the wattage (or the LED equivalent). If your chandelier has a dimmer, make sure you buy dimmable bulbs.
3. Secure the Ladder and Your Position
Place the ladder on a flat, non-slip surface directly beneath the fixture. For tall or tiered chandeliers, do not stretch to reach outer arms. Move the ladder. Overreaching on a ladder while holding a bulb is how accidents happen.
If someone is available, have them hold the base of the ladder. For single-arm chandeliers over a dining table, push the furniture aside first so you have clear footing.
4. Remove the Old Bulbs
Put on cotton gloves before touching any bulb. For screw-type bulbs (E14, E27), turn counter-clockwise. For pin types (G9), press the bulb inward slightly and pull out. For GU10, push in and turn 15 degrees anti-clockwise to release.
Use a soft cloth if you do not have gloves. Avoid bare skin on glass bulbs. The oils from your hands can cause hot spots that shorten bulb life significantly, especially with halogen types.
If a bulb is stuck and will not turn, it may have fused slightly from heat. Wrap it in a cloth, grip firmly, and apply steady pressure without forcing. If the glass separates from the base, stop and call a professional. This is a situation our chandelier repair team handles regularly.
5. Install the New Bulbs
Screw in E14 and E27 bulbs clockwise until snug. Do not overtighten as the socket cups on many chandeliers are held in place by the bulb tension and can crack under too much force. For G9 pins, align the two pins with the slots and press until they click. For GU10, insert and rotate clockwise until it locks.
If your fixture has decorative candle covers (the small sleeve that hides the socket), slide these back over the bulb base before you move to the next arm.
6. Test the Chandelier
Before coming down, do a visual check that all covers are in place and nothing looks loose. Then restore power at the breaker and test the chandelier. If one or more bulbs do not light, check that they are fully seated in the socket before assuming a fault.
While you are up there, this is an ideal time to do a quick wipe-down of the arms and any visible crystal. You have already done the hard part. See our full guide on chandelier cleaning for a proper maintenance routine.
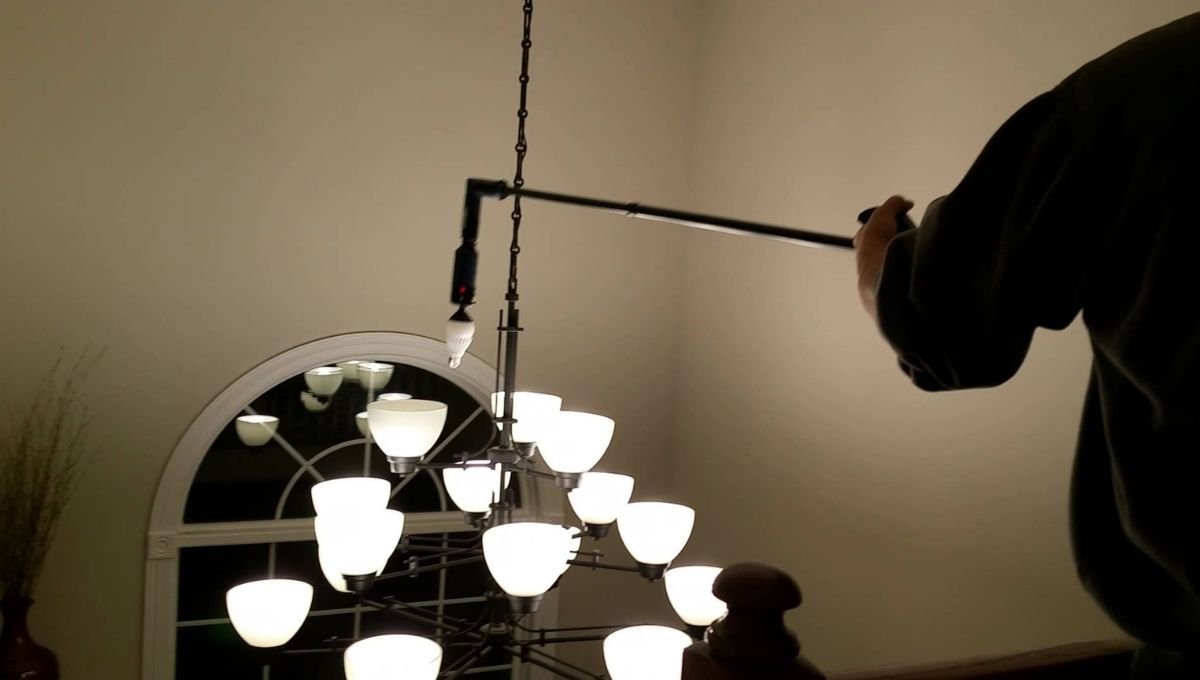
Is There a Tool to Change Chandelier Bulbs?
Yes. A bulb changer with an extension pole is worth owning if your chandelier sits on a high ceiling or in a double-height entryway. These tools use a suction cup head or a rubber gripper to grip and twist bulbs without needing your hands to reach them directly.
They come in different head sizes to match E14, E27, and GU10 sockets. The extension poles telescope from around one meter to three or more, so they work reasonably well for ceilings up to four meters without a ladder.
That said, they have limits. On ornate or tiered chandeliers with arms at different heights, a pole changer is awkward and often causes you to knock nearby crystal. For anything complex, a short ladder is still the more controlled option. And for ceiling heights above four meters, we strongly recommend our professional chandelier installation and servicing team rather than attempting it alone.
How to Change LED Lights in a Chandelier
LED replacements have a few nuances that standard bulb swaps do not.
Dimmability
If your chandelier is on a dimmer circuit, you must use dimmable LED bulbs. Non-dimmable LEDs on a dimmer will flicker, buzz, or fail prematurely. Look for the dimmable marking on the box. Even with dimmable LEDs, some older leading-edge dimmers are not compatible with LED technology. If you experience flickering after switching to LEDs, the dimmer itself may need replacing, not the bulbs.
Colour Temperature
LED bulbs come in colour temperatures measured in Kelvin. For most chandeliers in a home setting, you want somewhere between 2700K and 3000K. This gives a warm white light that reads as close to the old incandescent glow. Anything above 4000K will look cold and clinical, which is almost never what you want in a chandelier environment.
Beam Angle
For exposed filament-style LEDs (the ones that mimic vintage Edison bulbs), beam angle matters less. But for frosted or directional bulbs in recessed socket arms, a narrow beam angle can create uneven illumination across the fixture. Go for a wider beam angle, around 270 to 360 degrees, if you want even light distribution from all arms.
Integrated LED Chandeliers
Some modern chandeliers use integrated LED modules rather than replaceable bulbs. These cannot be swapped at home. If an integrated LED arm fails, the module itself needs replacing, which is a wiring task. If you are in this situation, contact us directly rather than attempting it yourself.
Are All Chandelier Bulbs the Same?
No, and this is one of the most common mistakes we see. Chandelier bulbs vary significantly by base type, shape, voltage, and wattage. Using the wrong bulb does not just look wrong. It can overheat the socket, damage the wiring, or void any warranty on the fixture.
The main variations you will encounter:
- E14 (SES): The small Edison screw. This is the most common chandelier base in Europe and the UAE, used on candelabra-style arms.
- E27 (ES): The standard Edison screw, larger than E14. Found in some pendant-style chandeliers and larger arm fixtures.
- G9: A pin base rated at 240V. Common in halogen chandelier arms, now widely available in LED versions. Do not confuse with G4 which is a 12V low-voltage pin base.
- GU10: A twist-lock base. More common in spotlights but used in some modern chandelier designs.
- BA15d / B22: Bayonet fitting. Less common in chandeliers but found in some heritage or period fixtures.
Bulb shapes also vary. Classic candelabra chandeliers use C35 candle-shaped bulbs. Many crystal chandeliers specify G45 golf ball bulbs. Getting the shape wrong does not always cause a safety issue, but it affects how the light plays through the crystal and how the fixture looks when lit.
Frequently Asked Questions
What type of bulbs should I use for my chandelier?
Match the base type of your existing bulb exactly. If you are unsure, bring the old bulb with you. For new installations, always check the manual or the wattage sticker inside the canopy. LED equivalents of the original wattage are the best long-term choice since they run cooler and last far longer.
How do I avoid breaking delicate bulbs?
Wear cotton gloves or wrap your hand in a soft cloth. Apply steady, even pressure when unscrewing rather than jerking or forcing. If a bulb is stuck, a rubber jar opener gives better grip than bare hands and reduces the chance of breakage.
Can I clean the chandelier while changing the bulbs?
Yes, and we recommend it. You already have the ladder in position and the power off. A quick wipe with a dry microfiber cloth on the arms and crystal takes five minutes and makes a visible difference. For a deeper clean, read our detailed chandelier cleaning guide before you get started so you have the right materials ready.
When should I call a professional instead of doing it myself?
Call a professional if the ceiling height is above four meters, if you have an integrated LED module that has failed, if a bulb base has separated inside the socket, if the chandelier shows signs of wiring issues such as flickering that persists after bulb replacement, or if the fixture needs to be lowered to access bulbs safely. Our chandelier installation and maintenance team handles all of these on a regular basis across Dubai.
Final Thoughts
Changing chandelier bulbs is straightforward when you know the socket type, have the right bulbs, and take the basic safety steps seriously. The mistakes that cost people time are almost always about buying the wrong replacement or rushing through the process.
If you have questions about your specific fixture or want a professional to handle the maintenance, Sparkle and Shine is available across Dubai for chandelier cleaning, installation, and repair. Get in touch and we will send the right person for the job.